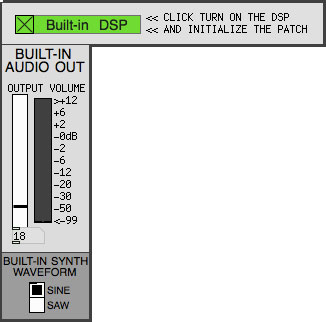
In this article we are going to talk about the audio output produced by the PD’s DSP. You can turn on the “Built-in DSP” as shown in the in the “GUI Overview“: one click on the check box on top left. When it is green, the PD internal DSP is turned on. You can adjust the output volume and select the waveform: sine or sawtooth.
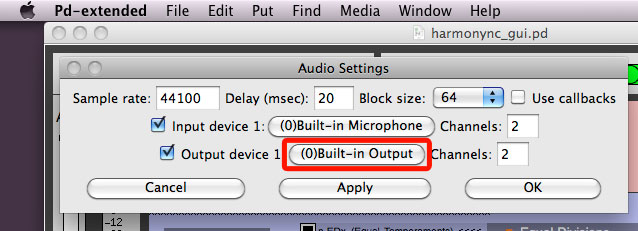
Then you have to set the audio output port in PD options.
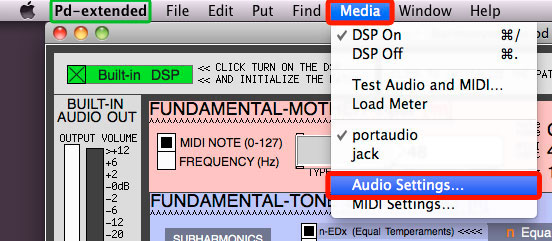
Table of Contents
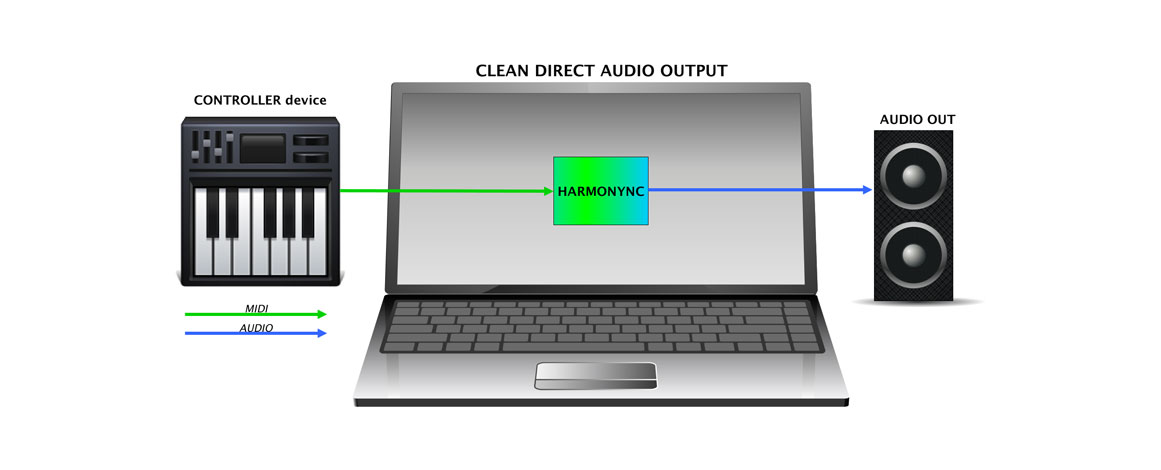
Direct audio output
Select your soundcard output as “Output device”.
You can send to the speakers the clean direct audio output from the Harmonync. This is the easiest way to play the Harmonync.
Physical FX
With the same “Audio Settings” You can also send the audio to an external (physical) audio effect first, and then to the speakers.

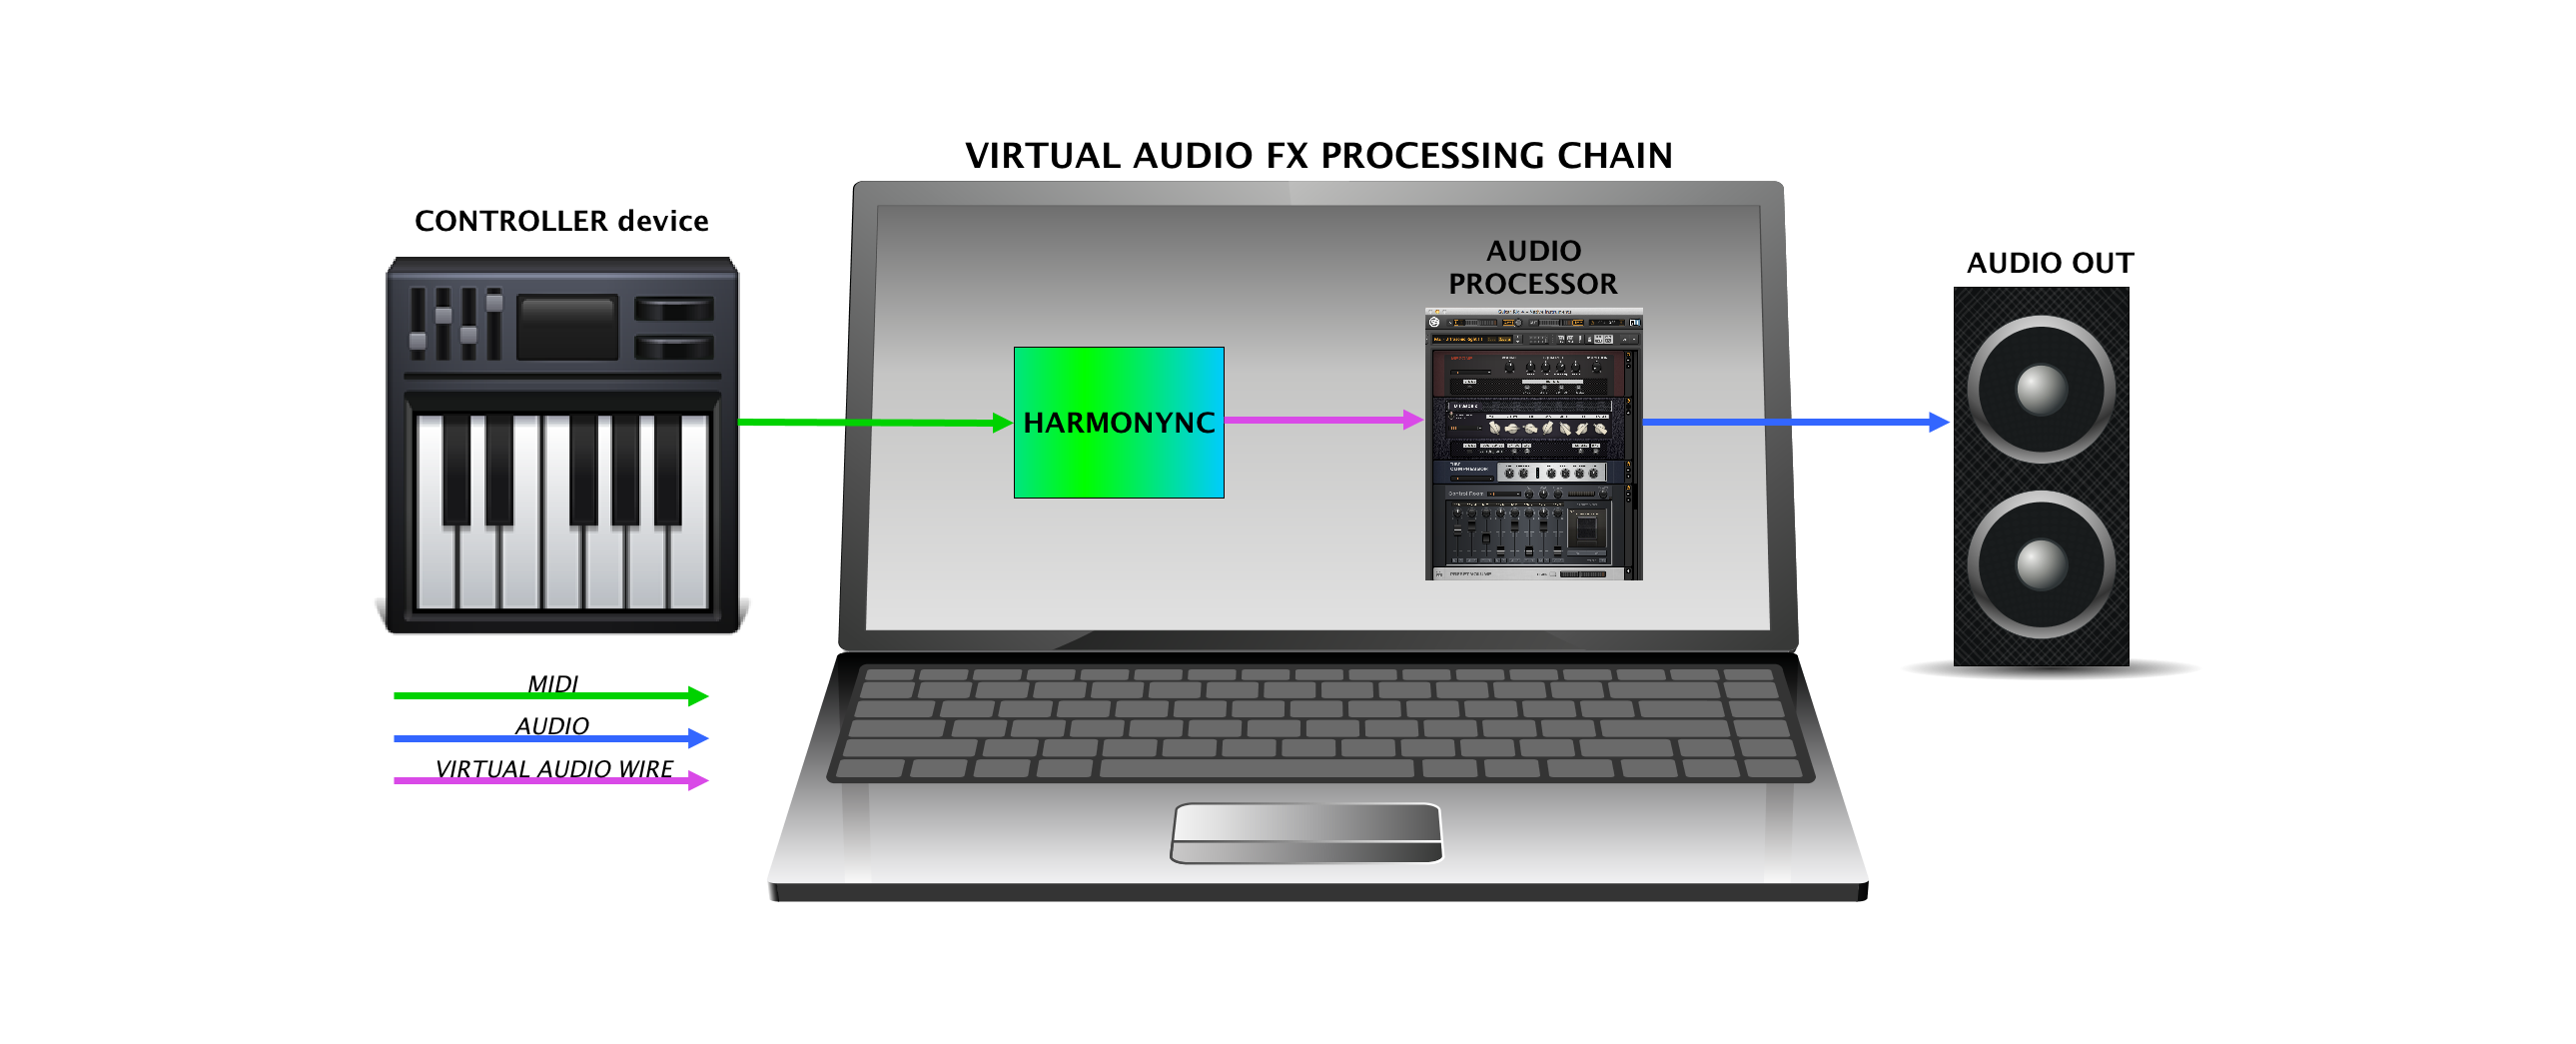
Virtual FX
Or you can send the audio to a virtual audio effect first, and then to the speakers.
Usually, software effects are loaded in a DAW. In some cases, an effect can also be distributed as stand-alone application.
In order to process the audio output by virtual/software effects, you can route the Pure Data output signal physically (through a wire) or virtually (through a virtual audio channel).
Soundcard: Physical wiring
If your soundcard has many outputs and inputs, you can easily wire an output port to an input port with a jumper cable.

If your soundcard has many outputs and inputs, I think you’re able to properly route the PD audio output to the effected track on your DAW, or to any stand-alone audio processor. If not, read the next part.
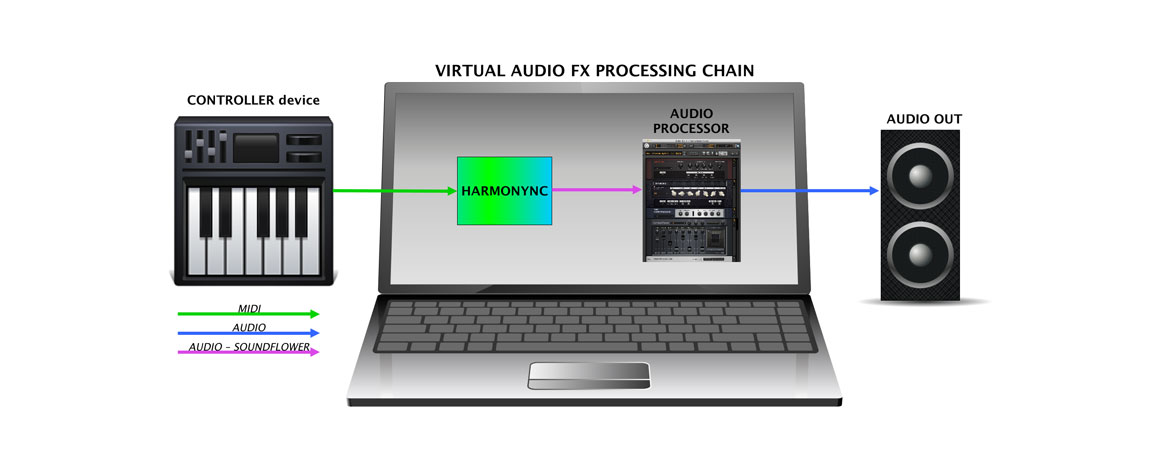
SoundFlower: Virtual wiring
If your soundcard doesn’t fit, you have to use a virtual audio channel.
Since Harmonync is a stand-alone program and it hasn’t ReWire, VST or Audio Unit capabilities, you have to redirect the PD audio output to the input of your processing chain. The trick is to route the output signal from Pure Data to a virtual audio device. With the appropriate drivers and system settings, it is possible on Win, Mac and Linux.
As you may imagine, the configuration of a virtual audio channel is different among different OSs. In this tutorial, I will explain how to do it, using Mac.
If you are using Mac, the easiest way is installing SoundFlower (that is a OS X system extension that allows applications to pass audio to other applications).
Let’s see how to set up a virtual audio connection between the Harmonync and your software.
- Close PD and your DAW, or whatever stand-alone audio processor.
- Download and install SoundFlower from here.
- Open the Harmonync patch.
- Under the PD “Media” menu, open “Audio Settings” and select “SoundFlower (two-channels)” as Output device. Click OK.
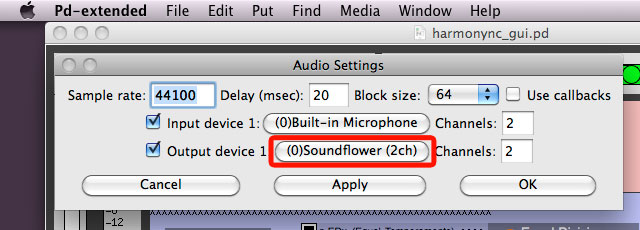
- Now, you have to set “SoundFlower (two-channels)” as Input device in the preferences of your software. If your software has no input audio settings, you have to set the input device of the Mac under “System Preferences > Sound > Input”.
If you are using a DAW, you might also have to check the input channel setting on the single track. Create a new audio track, and load an effect on it. In many DAWs you have to arm the track in order to listen the processed audio. - Finally, in the Harmonync, turn-on the “Built-in DSP”.
Studio scenario
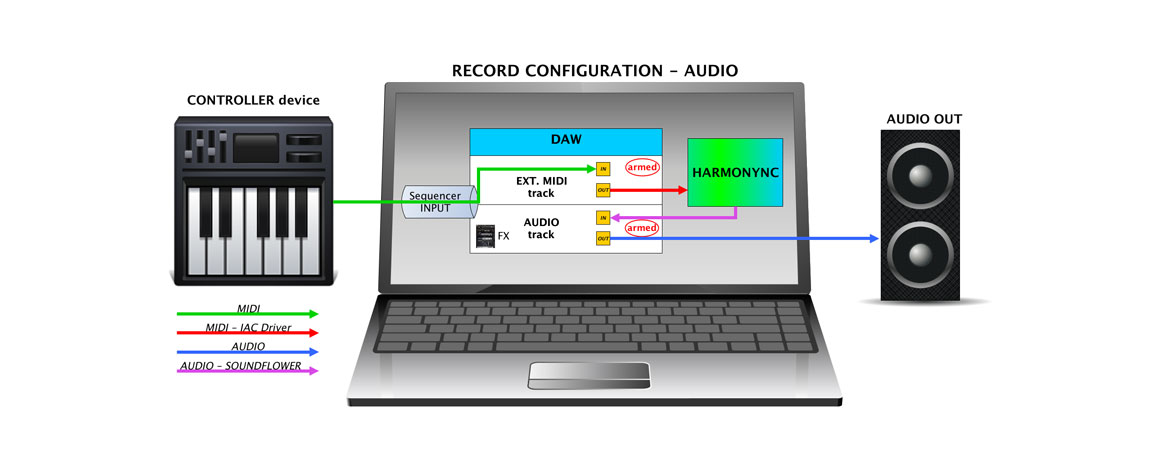
If you are composing in studio and using a DAW, I suggest to record the original MIDI performance (coming from the controller device) before send it to the Harmonync. It’s a bit more complex but, in this way, you can edit it and then mix down the audio coming from the Harmonync again.
First, record the original MIDI performance:
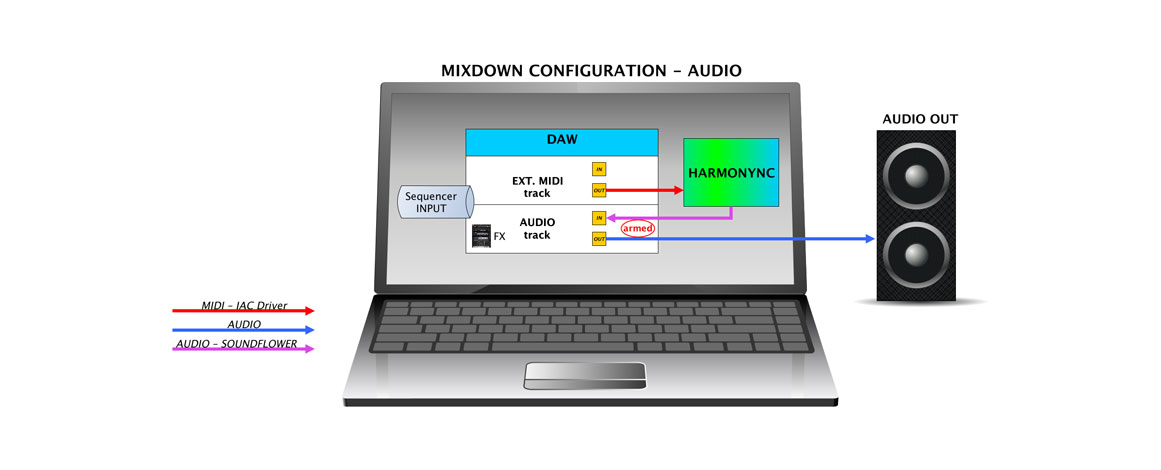
Then, mix down the audio output from Harmonync and record it into a track:
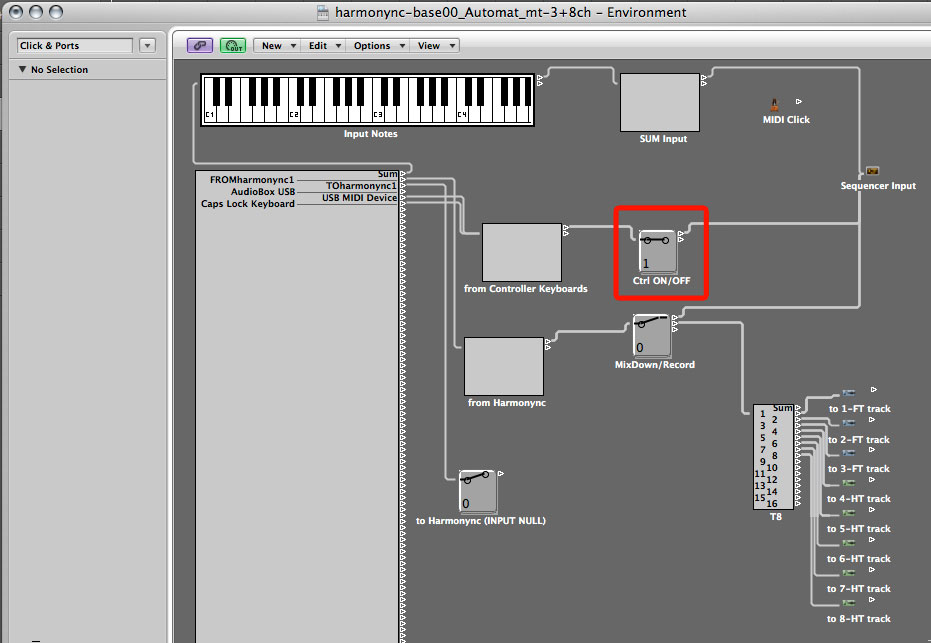
 |
This content is copyrighted: © 2015 Walter Mantovani – Some right reserved. |
|---|---|
| This work is distributed under the Creative Commons Attribution-NonCommercial-ShareAlike 4.0 International license. |
This content has been updated on January 14, 2016 at 10:51 am